監視ソフトといえば「Zabbix」が有名ですね。
監視ソフトはけっこう種類があり、NagiosやHinemosなど
それぞれに派閥()があるような印象です。
怖い怖い
そういった比較とかは今度気が向いたらするとして、
今回はVagrantを使ってCentos7にZabbix3をインストールしましょう。
どこの派閥でもないならなぜZabbixかって?
理由は簡単。
- Zabbixは一番多機能。これは間違いない。たぶん(笑)
- インストールも順序良くやれば、かなり簡単。
- インストール後、遊ぶ幅が広い多機能だからね。
インストールして、簡単な設定が終わったあと
ドキュメントでも見ながら自分で色々いじくれると楽しいでしょ?
準備
前提環境
- Vagrant
- VirtualBox
- ターミナル*WindowsならCygwinとか
Cygwinのインストール方法については
また別の記事でまとめます。
インストールするもの
Zabbix3
ちょっと前だとZabbix2系が多く利用されていましたが
Zabbix3を利用したほうがいいです。
ダッシュボードやシナリオなども
見やすくなっていると思います。
Zabbixとは?
Zabbixとは、オープンソースの統合監視ソフトウェアです。
ラトビアのZabbix社により開発が行われており、日本にも2012年から支社があります。
SNMP監視やエージェントレスといったシンプルな監視機能に加え、
Zabbix Agentを導入することによる高機能な監視の実現が可能になっています。
インストールする
まずはVagrantを使ってさっさっと仮想環境を作りましょう。
|
1 |
$ vagrant init |
もしかしてすでに別の仮想マシンを作っている方を考慮して
Vagrantfileをちょっといじっておきます。
|
1 2 3 4 5 6 7 8 9 10 11 12 13 14 15 16 17 18 19 20 21 22 23 24 25 26 27 28 29 30 31 32 33 34 35 36 37 38 39 40 41 42 43 44 45 46 47 48 49 50 51 52 53 54 55 56 57 58 59 60 61 62 63 64 65 66 67 68 69 70 71 72 73 74 75 76 77 78 79 80 81 82 83 84 |
# -*- mode: ruby -*- # vi: set ft=ruby : # All Vagrant configuration is done below. The "2" in Vagrant.configure # configures the configuration version (we support older styles for # backwards compatibility). Please don't change it unless you know what # you're doing. # 仮想マシンのホスト名 HOST_NAME = "test-zabbix" # VirtualBoxマネージャ上の仮想マシン名 MACHINE_NAME = HOST_NAME Vagrant.configure(2) do |config| # The most common configuration options are documented and commented below. # For a complete reference, please see the online documentation at # https://docs.vagrantup.com. # Every Vagrant development environment requires a box. You can search for # boxes at https://atlas.hashicorp.com/search. config.vm.box = "CentOS7.0" config.vm.host_name = MACHINE_NAME config.vm.provider :virtualbox do |virtualbox| virtualbox.name = MACHINE_NAME end # Disable automatic box update checking. If you disable this, then # boxes will only be checked for updates when the user runs # `vagrant box outdated`. This is not recommended. # config.vm.box_check_update = false # Create a forwarded port mapping which allows access to a specific port # within the machine from a port on the host machine. In the example below, # accessing "localhost:8080" will access port 80 on the guest machine. config.vm.network "forwarded_port", guest: 80, host: 8080 config.vm.network "forwarded_port", guest: 22, host: 2023, id: "ssh" config.vm.network "forwarded_port", guest: 3000, host: 3123 # Create a private network, which allows host-only access to the machine # using a specific IP. #config.vm.network "private_network", ip: "192.168.33.8" # Create a public network, which generally matched to bridged network. # Bridged networks make the machine appear as another physical device on # your network. # config.vm.network "public_network" # Share an additional folder to the guest VM. The first argument is # the path on the host to the actual folder. The second argument is # the path on the guest to mount the folder. And the optional third # argument is a set of non-required options. # config.vm.synced_folder "../data", "/vagrant_data" config.vm.synced_folder "../zabbix", "/vagrant" # Provider-specific configuration so you can fine-tune various # backing providers for Vagrant. These expose provider-specific options. # Example for VirtualBox: # # config.vm.provider "virtualbox" do |vb| # # Display the VirtualBox GUI when booting the machine # vb.gui = true # # # Customize the amount of memory on the VM: # vb.memory = "1024" # end # # View the documentation for the provider you are using for more # information on available options. # Define a Vagrant Push strategy for pushing to Atlas. Other push strategies # such as FTP and Heroku are also available. See the documentation at # https://docs.vagrantup.com/v2/push/atlas.html for more information. # config.push.define "atlas" do |push| # push.app = "YOUR_ATLAS_USERNAME/YOUR_APPLICATION_NAME" # end # Enable provisioning with a shell script. Additional provisioners such as # Puppet, Chef, Ansible, Salt, and Docker are also available. Please see the # documentation for more information about their specific syntax and use. # config.vm.provision "shell", inline: <<-SHELL # sudo apt-get update # sudo apt-get install -y apache2 # SHELL end |
ホスト側でポートなどをぶつからないようにいじったら
Vagrantを起動します
|
1 |
$ vagrant up |
起動したらsshでログインします。
|
1 |
$ vagrant ssh |
仮想マシン内に入ったら
とりあえずyumでアップデートしておきましょう。
|
1 |
$ sudo yum uodate |
前回の記事でも書いたけどCentos7は自分のパソコンから
ブラウザにアクセスできないので、ファイヤーウォールを無効にしておきます。
|
1 |
$ sudo systemctl stop firewalld |
それでは順を追ってZabbixのインストールをしていきます。
公式サイトを見れば全部書いてあるけどね。
Zabbix LLCのリポジトリ登録をします。
|
1 |
$ sudo yum install http://repo.zabbix.com/zabbix/3.0/rhel/7/x86_64/zabbix-release-3.0-1.el7.noarch.rpm |
Zabbix関連のパッケージをインストールしていきます。
|
1 |
$ sudo yum install zabbix-server-mysql zabbix-web-mysql zabbix-web-japanese zabbix-agent mariadb-server |
Zabbixのログとかを保存する
MariaDB用の設定をします
|
1 |
$ sudo vim /etc/my.cnf.d/server.cnf |
|
1 2 3 4 5 6 7 8 9 10 11 12 13 14 15 16 17 18 19 20 21 22 23 24 25 26 27 28 29 30 31 32 |
# # These groups are read by MariaDB server. # Use it for options that only the server (but not clients) should see # # See the examples of server my.cnf files in /usr/share/mysql/ # # this is read by the standalone daemon and embedded servers [server] # this is only for the mysqld standalone daemon [mysqld] #ここから下 character-set-server = utf8 collation-server = utf8_bin skip-character-set-client-handshake innodb_file_per_table #ここから上 # this is only for embedded server [embedded] # This group is only read by MariaDB-5.5 servers. # If you use the same .cnf file for MariaDB of different versions, # use this group for options that older servers don't understand [mysqld-5.5] # These two groups are only read by MariaDB servers, not by MySQL. # If you use the same .cnf file for MySQL and MariaDB, # you can put MariaDB-only options here [mariadb] [mariadb-5.5] |
上のように編集したらデータベースの起動と自動起動の設定をします。
|
1 2 |
$ sudo systemctl start mariadb $ sudo systemctl enable mariadb |
データベースの初期設定と、初期データの投入をします。
このとき"password"は任意で構いませんが、
必ず覚えておいてください。
|
1 2 3 4 5 |
$ mysql -uroot MariaDB [(none)]> create database zabbix; MariaDB [(none)]> grant all privileges on zabbix.* to zabbix@localhost identified by 'password' ; MariaDB [(none)]> exit $ zcat /usr/share/doc/zabbix-server-mysql-3.0.4/create.sql.gz | mysql -uroot zabbix |
Zabbixサーバーで使用するDBを設定ファイルに記入します。
|
1 |
$ sudo vim /etc/zabbix/zabbix_server.conf |
109行目あたりからのDBPasswordに
先ほどMariaDBで設定した"password"を記入してください。
|
1 2 3 4 5 6 7 8 |
### Option: DBPassword # Database password. Ignored for SQLite. # Comment this line if no password is used. # # Mandatory: no # Default: DBPassword=password #←これを記入すれば最低限動作します。 |
次にWebインターフェースの時間帯を設定します。
|
1 |
$ sudo vim /etc/httpd/conf.d/zabbix.conf |
|
1 2 3 4 5 6 7 8 9 10 11 12 13 14 15 16 17 18 19 20 21 22 |
# # Zabbix monitoring system php web frontend # Alias /zabbix /usr/share/zabbix <Directory "/usr/share/zabbix"> Options FollowSymLinks AllowOverride None Require all granted <IfModule mod_php5.c> php_value max_execution_time 300 php_value memory_limit 128M php_value post_max_size 16M php_value upload_max_filesize 2M php_value max_input_time 300 php_value always_populate_raw_post_data -1 # php_value date.timezone Europe/Riga php_value date.timezone Asia/Tokyo #←Asia/Tokyoに変更 </IfModule> </Directory> |
いよっしゃー!!
あとはデーモンを起動するだけです!!(+ 自動起動も)
|
1 2 |
$ sudo systemctl start zabbix-server zabbix-agent httpd $ systemctl enable zabbix-server zabbix-agent httpd |
ではZabbixをブラウザで開いてみましょう!!
http://localhost/zabbix/
(http://IPアドレス/zabbix/)
英語の設定画面が出ますが気にせず「next step」を押していってください。
Configure DB connection
のpasswordにはMariaDBのパスワードを入力してください。
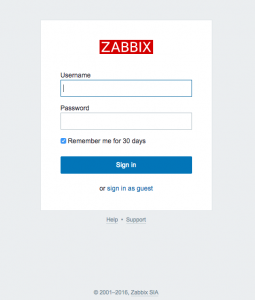
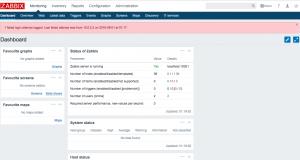
あとはクリックしていけば設定は終わりログイン画面に行きます。
Username:Admin
Password:zabbix
やったーー!!
やっぱり簡単だねこれ。
あとはいじいじしてみてね
じゃあね~


